Where to download and how to install the game minicraft. Installing Minecraft: All methods and solutions to errors
The computer game Minecraft is very popular among players of all ages. In it, you can build your cities and buildings separately, or you can go on a journey with friends for rare fossils. Installing and downloading the game is as simple as the gameplay itself, however, new players often have questions about downloading, since there are so many versions and different servers in it. In this article, you will learn how and where you can download Minecraft for your computer, how to install it and where is it better to find your first server.
How to download licensed Minecraft to your computer
With this question, everything is extremely simple, since the official site of the game is one - this is Minecraft.net. By clicking on the link, you will immediately find yourself on the download page of the client for the game. However, it is worth knowing that you will not be able to play using this launcher, since you need to pay for your account using the link https://minecraft.net/ru-ru/store. The game is paid and implies a one-time purchase on the official website.
If you decide to play licensed, then you need one single site, here you will find all the instructions and links. If you are looking for amateur servers that you do not need to pay for, then proceed to the next step.
How to download unlicensed Minecraft to your computer
There are many sites on the Internet that offer the game on their servers absolutely free. For any server, one launcher is suitable for you, and where to download it is quite easy to find. For example, the site http://minecraft-mod.su offers a launcher for download and many articles about versions.
- Click on any version on the right side of the site to see what's new and interesting.


- To download, click on the link at the top of the page. Wait for the file to download to your computer and unzip it.


- This is how all the clients of the Minecraft game look. You will see a splash screen or an advertisement for some servers, and at the bottom there will be a panel for entering the game. You need to indicate your nickname for the game, and under it select the version that corresponds to the selected server.


- Which is very convenient - you do not need to download different versions of the game, since all of them are already available to you in a special list. Just choose the version that interests you.


On which Minecraft server to play
When choosing your first server, you need to immediately prioritize what version of the game you want, what exactly will you do. As a rule, mods are installed on the servers - these are special changes that bring something new to the game. For example, unusual blocks, the ability to jump high, or mini-games several times a day.
- On the site
Since you have appeared on this page, then you are a big fan of the game Minecraft or want to join the ranks of its fans, or at least just decided to try what this world, consisting of cubic blocks, is. What can be said for sure, you went to the correct site. Here you can download both Minecraft itself and everything you need for it.
It all depends on what you want to download and install. The installation order for, and the Minecraft client itself will be slightly different.
Installing the Minecraft client
- Select the one you want.
- Go to the bottom of the page.
- Wait a few seconds and a direct download link will appear.
- Click on the link and download the archive or jar file.
- Unpack the archive to a folder on your computer% appdata% \. Minecraft.
- For Windows 7 and 8, this will be C: \ Users \ YourUserName \ AppData \ Roaming \ .minecraft
- For Windows XP C: \ Documents and Settings \ YourUserName \ Application Data \ .minecraft
- Everything is ready. You can launch the game through the launcher.
Installing a resource pack with textures
- In the resource packs section, find the one you need.
- A direct link will appear at the very bottom of the page in a few seconds.
- Download the archive file from this link. You don't need to unpack it.
- On your computer, open the folder % appdata% \. minecraft \ resourcepacks.
- Copy the downloaded archive with the resource pack there.
- Start Minecraft, then "Settings" - "Resource Packs". Find your new resource pack in the list and add it to the right field. Click Finish.
- That's it, the installation is complete, you can play.
Instructions
Minecraft will not be able to function without the Java software platform, so install it first (if you have not already done so). Download the latest version from the official website of the manufacturer, choosing the one that suits the bitness of your operating system. Having installed Java, go to its Control panel (through the control panel, which you will find in the start menu of the computer) and immediately enter the required RAM parameters in the line with Runtime Parameters - how much you want to allocate for the game (it is allowed to install them at a level below the total RAM ). This is necessary for it to function without errors.
Find on any reliable "ovsky" resource the installer of the game client of the version that you need. To start the installation, start the document with the .exe extension. In this case, Minecraft will be automatically installed in the directory where it should be located. If you only have a zipped folder without any visible exe files, you will need to redirect its contents to the appropriate directory yourself. How exactly to do this depends on which version of Windows you have.
If you have to deal with XP, go to the start menu of your computer, find the Run line there and enter% AppData% in it. You can try to find the folder you want in a slightly different way. Go to C: / Documents and Settings in the folder with your username and find the Application Data directory there. Copy the game files there. If you do everything correctly, a new folder will be formed at the above address - .minecraft.
For Windows 7 or Vista, copy the files from the game installation archive to another location on your computer. Go to drive C, go there to the directory with users and click on the folder with your name. To open it correctly, click on the address bar in this window. The resulting address should end with AppData \ Roaming. This is the directory needed to install Minecraft. Press Enter - and the game folder will appear there.
If, after the above steps, the gameplay does not start, and an error message with the video card drivers is displayed on the screen, it means that they are simply outdated or have not been installed at all. Correct this mistake by downloading and installing the appropriate software. Now open Minecraft, start creating a new world in it, adjusting its settings (mode, difficulty level, etc.) and enjoy the game.
In this article I will tell you in great detail how to install mods for the game Minecraft, so if you want to diversify your minecraft with mods, but do not know how to install them into the game, then here is an excellent installation guide.
The guide is suitable for both the licensed version of minecraft and the pirated version, there is no difference.
What is needed to install mods on Minecraft?
Minecraft game of one of the versions.Hands.
99% of modern mods are installed by copying the mod file into the Mods folder, but let's get it all in order:
At the moment, 98% of mods use a special mod loader called, and about 2% use.
Therefore, in this article it will be shown using the example of Minecraft Forge, it is installed completely in the same way.
Let's start installing the mod:
Step 1.
Let's find out what version of the game you have, start the game and in the game menu you will see the version:Step 2.
Great, let's say we have Minecraft 1.12.2, now we need (link), download it for minecraft 1.12.2.
There are 2 types of automatic installer, file installer as program .exe and the installer file .jar, there is no difference between them at all, but for many players, the .jar file opens as an archive, or stupidly does not start, because it is simple download the .exe installer and run it.
Installation example:

Step 3.
Now open your minecraft launcher (the program that launches the game). A new version of Minecraft with the forge postscript should appear in it:
Here's an example from two launchers:


We select the version of Minecraft with the postscript Forge, run, if it starts, great, close the game immediately.
If it does not start, you probably already have mods or mod files in the game folder that prevent the game from starting, you need to look at the error. Read the news below about the reasons for not launching the game.
Step 4.
Now we need to select the desired mod for minecraft, the version of the mod must match the version of the game, that is, mods for 1.12.2 are only suitable for 1.12.2, rarely (or if indicated) mods from 1.12 may be suitable for version 1.12.1 or 1.12.2, try it.
Downloaded the desired mod, also read the brief installation for each mod, in some cases there may be some additional steps.
Step 5.
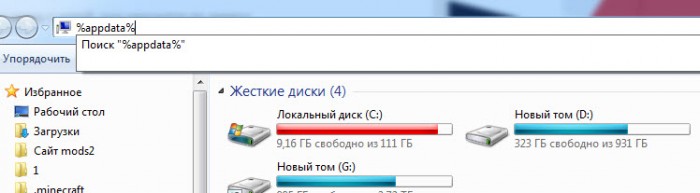
Just in any folder, enter% appdata% in the address bar and press Enter:
Installing the mod into the game, first we need to get into the folder with the game, it is located at:
C: \ Users \ Your_User\ AppData \ Roaming \ .minecraft
If you cannot find the folder
Appdata:
You need to enable showing hidden folders and files.
Or press start - in the find field, enter this:% APPDATA% and press enter, there you will find the .minecraft folder.
Or you can enter the Win + R combination on the keyboard (the Win button is a button between Ctrl and Alt on most keyboards, there is a Windows icon on it).
In the window that appears, enter% APPDATA% and press Enter there you will find the Roaming folder, and in it .minecraft.
Some launchers can change the name of this folder to something else, for example to .tlauncher
If you have Windows 10, then open Explorer go to the "View" tab. Then click on the "show or hide" area and check the "hidden items" option. 
Further, you can find this folder where it should be.
Inside folder .minecraft you will find the folder mods if not, create it.
Copy the downloaded mod file to the mods folder, start the game - the version of the game with the Forge postscript.
Done, you are beautiful.
Possible problems and solutions:
Can't open Forge installer like forge-1.12.2-14.23.1.2556-installer.jarAnswer: download and install.
After installing some mods, the game does not start, crashes at startup without an error:
Answer:
This happens, there is a problematic mod, or one mod is not compatible with another mod, or some mod requires an additional mod to work. Look for incompatible mods by deleting mod files, update mods to more recent versions. (mod versions, not game versions).
Perhaps the mod requires additional libraries, usually the authors and those who post the news indicate the need to install additional mods, read the news with the mod in more detail.
It is extremely rare, but it happens that the version of the mod is not compatible with the new version of Forge, if the mod is old, you may have to find and install an older version of Forge.
You will probably have to stop using the problematic mod.
The game starts, but the message is displayed, there is no game menu.
Answer: As a rule, if a critical error did not occur, then Minecraft Forge tries to report a possible reason, for example:
1) Some mod requires a more recent version of Minecraft Forge. (for example forge-1.12.2-14.23.1.2556-installer.jar - where 1.12.2 is the version of the game, 14.23.1.1.2556 is the version of the bootloader itself), you may need to install a more recent minecraft forge bootloader.
2) Some mod requires an additional mod, it will be written there, the mod requires a name: name, you need to find this mod and drop it into mods.
3) You copied a mod in Mods for another version of the game, then usually writes that this mod requires a game version of this.
What to do if after installing Forge the game does not start, or does not start at all.
Answer:
Save your minecraft world, delete all content in the .minecraft folder, re-download the game version, and go through the Forge installation again.
Or find another launcher for minecraft, similarly delete everything from the .minecraft folder, install the game with another launcher,
Disclaimer: This article is educational, and is aimed primarily at the "greenest" computer users. This installation is suitable only for licensed Minecraft users.
To install Minecraft, we need to have at hand JRE (Java Runtime Environment), since this game is written in the Java programming language, we need some kind of engine to run this game. Where to get it, you ask? But everything is not so scary, this engine is on every second Minecraft site, but we will use official sources.
So, first we need to download and install the JRE.
You should be presented with a page like this:
Click on the big red button in the center of the screen, then select your operating system (if necessary). You most likely have Windows and the download should start automatically.
Step 2. Install the downloaded package.

Depending on which installation method you chose, you will be given two different installation options (Installation in automatic mode, a small file is downloaded, then the installer will download and install Java itself, you only need to specify the path to the folder where to put it, and installation in a semi-automatic mode, the only difference is that in one of the cases you will have to download a larger file. This is not critical).
After the Java installation is complete, you can start installing Minecraft itself.
Step 3. Install Minecraft
To start the installation, you need to download Minecraft from the official website, you can download it by.
After downloading, put the file in Minecraft.exe in some place convenient for you. (I recommend putting it in a separate folder, because the exe-shnik will create folders for itself). After you've put everything in its place, run Minecraft.exe.
On first launch, you will see a screen like this:

In the login field, enter your login, in the password field, your password, respectively. Click on the Login button, and you will start downloading files with the game, along the way, folders will start to be created next to the exe-file. You should see the following picture:

After the download finishes, the Minecraf installation will be completely finished. You will find yourself in the main menu of the game, after which you can start playing.
Ask your questions in the comments, we will be happy to answer them.

 Lures in Pokemon GO: about the features of the application Where to get lure modules to attract Pokemon
 Cool nicknames for fortnight
 Primal World with Stonies Primal PC Games
 Endless War - play online