Crafts from coins. Painting from coins "Money tree Money panel from coins
The art of Feng Shui teaches us: in order to become rich, it is imperative to have a money tree, because it is this tree that attracts material wealth and wealth like a magnet. In souvenir shops there is a wide selection of such talismans for every taste, but if you make a money tree with your own hands and put a piece of your soul into it, this will enhance its effect several times. We bring to your attention several options for making a homemade tree, which does not lose either its beauty or magical abilities from this.
Topiary of coins
 When starting to make topiary from coins (a decorative tree with a curly round crown), you should adhere to the rules:
- The main emphasis is the crown, and its diameter should be larger than the pot in which the tree grows.
- The maximum size of the pot is equal to the width of the crown, but it is better to take a less voluminous pot so that it does not draw attention to itself.
- The total height of the souvenir tree will be approximately three diameters of the crown itself.
- The trunk should be thin but firm.
- To prevent the tree from falling, the base pot must be filled with heavy filler.
One of the simplest coin money tree options is to use a round foam ball as the base for the crown. Some craftsmen make it from newspapers, folding them tightly and gluing them, but this option is not the best, since it is very difficult to achieve an even rounded shape. To make the crown perfect, it is better to choose a foam ball. Its size depends on the desire and the number of coins available, but it should be borne in mind that there should be a lot of them, because the ball is completely covered.
The ball should first be pasted over with paper napkins - so it will not be slippery and the coins will stick better.
So, in order to make a topiary money tree with your own hands, you need to pick up small coins of the same denomination, for example, 10 rubles. They can be fixed either with a thermal gun or with PVA glue (the first option is preferable, since it will provide good adhesion). The crown should be formed in the form of scales, namely:

A small area of the ball should remain empty - the barrel will "grow" from here.
The trunk of a tree can be made from an ordinary sushi stick, and then it will be flat, or from a piece of thick aluminum cable, bizarrely bending it. Painting will give a golden effect to the wooden trunk, while the cable must be wrapped with tape or paper of a similar color. 
It remains to collect and "plant" the money tree, namely:
- Fix the barrel in the left hole on the ball-crown, using glue if necessary.
- Fill a small plastic glass or an ordinary cup with plaster and set the tree.
- When the gypsum hardens, glue the "soil" in the glass with coins, paint with golden paint or cover with sparkles.
- Decorate the pot with paint or glue it over with beautiful lace.
If desired, you can attach leaves or bows to the stem, and plant a butterfly on the crown - it all depends only on the imagination of the master.
Graceful money tree with branches
 You can make a very delicate money tree with your own hands from coins and wire: a beautiful falling crown with golden leaves-coins will be the main decoration of the house. Making a talisman is not difficult, for this:

Coins can also be combined with beads, and the barrel can be shaped differently.
Painting of coins
 Not only a three-dimensional tree looks spectacular, but also laid out in the form of a picture on canvas or paper. Such work can be done with children, because there is nothing complicated in how to make a money tree in a picture. The craft itself is as follows:
- Draw an outline on the canvas (trunk and crown).
- Lay out the trunk from the paper napkins twisted into flagella.
- Lay out the crown from the coins.
- Paint everything with golden paint.
- Insert the picture into the frame.
What does the money tree symbolize?
 There are many signs associated with the money tree. According to the teachings of Feng Shui, the main task of this talisman is to attract financial well-being and wealth to its owner, but the effect will be only if the tree is put in the right place, namely in the zone of wealth. The southeast side of the room is responsible for this, and to enhance the effect of the money tree, it is recommended to install a fountain nearby.
Chinese experts in Feng Shui insist that decorative talisman trees should have 10 branches on which exactly 100 coins are located - this is the combination that has the maximum magical effect.
If you shake such a tree and jingle with coin-leaves, you should expect material benefits soon. Whether it is true or not is up to you to decide.
As for the living money tree (bastard), the plant also retains its symbolism if properly cared for. In this case, in order for the flower to affect the material condition in a positive way, it is necessary to regularly wipe the leaves, preventing the formation of dust on them - it will lead to the opposite effect (spending and loss of money). The drying out of the bush also portends an unplanned waste.
To activate the action of the fat money tree, put a coin on the bottom of the flowerpot and rinse it under running water every year before Christmas.
Summing up, I would like to say: if there are supplies of small things in the house, including old coins, you should definitely try to make a talisman out of them. A money tree made with love with your own hands will not only decorate the house, but also become an original gift for friends and acquaintances.
Making a money tree from beads - video
Today, hand-made paintings are gaining great popularity. They are a wonderful gift for a birthday, for a housewarming party, for a wedding, or just like that. Paintings made with his own hand are very individual and unique. Each of them carries a piece of heat with which it was made. At the moment, there are many painting techniques. We will consider one of them in detail today. It is believed that the painting "Money Tree" brings financial well-being to the house.
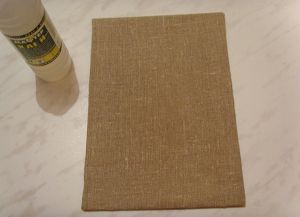
Wallpaper (burlap, fabric may be suitable);
-coins;
- three-layer napkins 3-4 pieces or toilet paper;
-water;
-acrylic paints (black, gold, silver);
- foam sponge;
-pencil;
-scissors;
- foam sponge;
-glitter -glitter (can be found in cosmetic stores);
-frame for photos (or for a picture);
-PVA glue (quick-drying or heat gun is also suitable).
Step by step description of the work. First stage. It is necessary to cut out a blank base for the future picture. Having disassembled the photo frame, attach the back of the plywood to the wallpaper (burlap or fabric), circle it with a pencil and cut it out. Use glue to glue the blank onto the face of the plywood. When the wallpaper is dry, draw a wood pattern.
Second phase. Add a little PVA glue to a plate of water (approximately 1: 1). Three-layer napkins must be cut into pieces of different widths 2-3 cm.

When the strips are cut, take one at a time and carefully dip them into a plate of liquid, but do not soak too much, since the napkin may creep. At an angle of 45 degrees, carefully start twisting them into tubes with your palms. Twist tightly if possible. Different widths of the strips are required in the future to form the crown of the tree (thicker - for the crown, thinner - for the twigs). When a sufficient number of flagella have been wound, leave them to dry completely.
Stage three. Apply PVA glue with a small layer on the workpiece, in the place where the crown of the future tree is drawn. On a damp surface, alternately lay out twisted paper cords, giving a bend to the tree, forming branches, roots and a crown.

Stage four. Degrease the coins before gluing them. It is best to degrease with alcohol or detergents (for glasses or for washing dishes). The crown of the tree is ready and dried.

Glue the coins with quick-drying glue (if not, use a glue gun).

Fifth stage. The tree is fully assembled. It remains to paint it.

Sprinkle everything well with black acrylic spray paint. Allow the paint to dry, if necessary, cover with an additional layer of gold spray paint. After dipping a dry foam rubber sponge in silver acrylic paint, you need to walk over the whole picture.

Do not press hard on the canvas, lightly, as if rubbing the color. Allow it to dry again.
Sixth stage. With a dry foam rubber sponge, dipping it into acrylic paint already golden in color, blend only on coins.
According to the ancient Chinese teachings of Feng Shui, the use of various signs of wealth positively affects a person's luck and well-being. The money tree is called one of the most powerful symbols of attracting material wealth. At the same time, it is not at all necessary to buy a living plant and grow it for a long time. You can create a tree in the form of a picture of coins with your own hands. Such a wonderful craft will fill the house with positive energy of well-being and happiness, as well as bring prosperity.
A canvas for good luck
To make a picture, you will need the following materials:
- photo frame, the size is selected depending on what size the tree will be;
- fabric for the main background, it is better to choose a denser one;
- paper napkins;
- glue;
- coins, all of the same denomination are selected, but it is possible of different ones;
- thermal gun;
- acrylic paint, it is recommended to choose black and bronze;
- scissors;
- brush;
- marker or pencil;
- a small piece of foam rubber or a sponge.
The master class consists of the following stages. First stage. First you need to carefully remove the glass from the frame and put it aside for a while. Attach the cardboard base to the fabric and trace with a pencil. Cut out the fabric, and apply glue in a thick layer on the cardboard. Stick the fabric onto cardboard and dry thoroughly. Now you can draw a sketch of the future tree.
While the fabric is drying, we do not waste time, but prepare the coins for work. They need to be cleaned and degreased to make it easier to paint.
Second phase. Each napkin should be folded in half and cut to create long, flat surfaces. Depending on the texture of the future tree, the strips are made from one to one and a half centimeters in size.
You can start twisting the harnesses. We lower a strip of napkin in a cup of cold water. She should be completely wet. We carefully remove it so that the strip does not break and lose its shape.
We hold the strip in the palm of one hand, and with the other we begin to slowly twist it into a tourniquet. The process is similar to making "sausages" from plasticine. In this case, you need to try to twist the tourniquet at approximately an angle of 45 degrees. Twist it as tightly as possible and, spreading it out at a short distance from each other, let them dry well.


Stage three. To facilitate the work with the flagella, it is necessary to moisten them quite a bit with water. You can use a flower sprayer. Next, we take one flagellum, grease it well with glue and apply it to a prepared base made of cardboard and fabric. A sketched sketch of the tree will help distribute the harnesses in the desired direction. But it is worth remembering that you do not need to apply too much glue. Excess glue can impair the appearance of the wood after drying.

Stage four. You can use a glue gun to create thin branches of the crown of a tree. Hot glue is applied in thin strips along the contour of the sketch branches. And while it is still not frozen, we glue the coins. To create a more voluminous image, you can stick several layers of coins, placing them in any order. The number of layers and coins depends only on the wishes of the master. The "cobwebs" left on the tree after using the glue gun can be safely removed with a stiff brush. After this, the painting must be allowed time to dry completely.

The final stage. Now the elements of the picture, namely the trunk and crown, must be primed. Using a piece of foam rubber, apply a layer of black acrylic paint to the entire tree. And again we leave to dry. The trunk of the tree will have to be covered with black paint one or two more times. When dry, the wipes can absorb the color almost completely.

Next, take a bronze-colored acrylic paint and pour it a little into a shallow container. We dip the sponge quite a bit into the paint and easily, with the same effort, we go over the entire tree and the background. If you are not sure what will turn out well, it is best to practice on a piece of paper or a piece of cloth first.

Instead of bronze acrylic paint, you can use silver or gold paint. You can try color combinations on a different surface, this will help you choose the final version.
Also, for work, you can choose not acrylic paint, but paint in a spray can. When painting with such paint, remember that when applying, you need to hold the balloon at a distance of about 50 cm and spray with smooth movements. If desired, the frame can be painted or decorated with coins. Then turn our picture frame face down, lay the glass neatly. Fasten the resulting picture with clamps on the frame.
The picture with the image of the money tree is ready!

Below are several photos of variants of a tree made of coins.
It turns out that it will not be difficult for a woman not only to make a salad and a scandal out of nothing, but also to find an adaptation for any little thing, turning it, at least, into a funny souvenir. It can be the notorious plastic bottles, and burned out electric lamps, and cellophane bags. The most recent trend is crafts from coins.

You can build such an owl from coins. The base can be purchased at a store that sells handmade materials.

How do you like this penny portrait of Sherlock?

A goldfish made of coins should bring financial success to your home.
Actually, coins in jewelry and souvenirs are not new at all. Think of the gypsy monistos, created from many tiers of coins of different denominations. They were also adorned with the edges of scarves, and during the dances they rang cheerfully to the beat of the dancer's movements. Various pendants, key chains, talismans were made from coins. Recently, various Chinese trinkets such as a money tree, souvenir toads and gods sitting on coin placers have been revived. It is believed that this is not only cute, but also very symbolic, as it accompanies the material well-being of the owner of such a toy. Who knows, all of a sudden feng shui will work, but at least it won't get any worse. But a funny souvenir made of coins, and even made with his own hand, will certainly delight the eye. And the process of its manufacture can become an excellent relaxer. Working with coins and other little things can be so captivating that it becomes a real outlet in the world of vanity, eternal rush and endless problems. Just try it once! Moreover, souvenirs from coins Made with your own hands, with a soul invested in them, can be a wonderful gift for a birthday or for a wedding of friends.

From coins of different shapes and colors, you can achieve the effect of a game of light in a picture of coins.

Having pasted it on the canvas, it will not be superfluous to hang such a picture in the house and it will bring financial success.

At the Olympics in London, they laid out just such a mosaic of fines.

Pennies were laid out in several layers.
Where can I get coins? And the stale piggy banks, and the compartments of women's handbags, wallets or pockets littered with trifles, and Soviet rarities lying around unnecessarily, kept just in case! Or maybe this is exactly the case? So, we rake out all the stash and to the point!

If enough coins have accumulated, then they can be used to decorate the walls!

Coins in the interior will look even better than Italian tiles.

Some hotels make walls out of coins.

Old furniture can be decorated with coins and varnished.
The first and the simplest option is to make an original souvenir that will serve as a real talisman, attracting financial well-being and good luck to you. To make it, you need to prepare some voluminous object with smooth lines, for example, an old vase, a jug or even a simple bottle. You will also need plasticine and many small coins - it is desirable that they are of the same denomination. Penny coins are best suited, because of the small size, which the souvenir will look more delicate and sophisticated. The manufacturing process is DIY coin crafts simple to the point of being primitive. To begin with, on the surface of a vase or other object with which you decided to work, a thin layer of plasticine is evenly applied, and then, one row after another, coins are attached according to the principle of scales - from the bottom of the vessel to the top. In this case, you need to carefully monitor the distance between the rows, avoiding too wide gaps. If a trifle of different value and quality, then it will have to be sorted before starting work, separating the newest and most shiny coins, especially pleasing to your eye, to decorate the upper part of the dishes.

An old vase in the alteration will shine with new colors.

For the vase, it is better to choose bright shiny new coins or clean old ones. Cover the vase with black lacquer or paint and glue the coins. you can use Moment glue for iron and porcelain.

Remember to ventilate the room. The glue is toxic.

This is how we got a vase. Looks very solid, doesn't it?
The largest and dimmest coins should be attached to the bottom of the vase. If the object to which the plasticine with money layers is attached is too large in size, then coins of different colors and denominations will look very appropriate on it. For example, from white and yellow metal, you can form real patterns over the entire surface. Nothing limits your imagination here. After the completion of the work, the finished craft must be protected from darkening of coins and dust by covering it with several layers of transparent varnish. After the varnish dries, you will get a wonderful work of art, which will allow you to be proud of yourself: after all, a real masterpiece has been created with your own hands!

To make this ring, we used two one euro cent coins and a two cent coin (base).

To work you will need: nail polish, a base ring and three coins.

Paint two coins with nail polish and glue them together as we did.

Coins will also make wonderful earrings.
Funny crafts from coins can be obtained using a minimum of tools: a drill with a thin drill or superglue. The simplest option is a pendant: if you drill two thin holes at the bottom and top of the coin, you can assemble such a decoration of any size and shape.

This is the kind of money waterfall can be obtained with skillful pens.

We will need a glue gun or just a tube of glue, coins of different denominations, a fork and a cup with a saucer for work.

Bend the fork in this way.

As you understood, the fork is the basis of our money waterfall.

Glue the fork to the saucer and wait until the glue dries.

Now glue the cup to the fork.

Then build the waterfall itself out of coins.
You can make a table souvenir from coins glued together in the form of a tower or a pyramid. And if you collect ordinary beads, in which coins of different materials alternate, and fasten them, for example, with wire rings, and even put them on a chain, you will get not just a necklace, but a real necklace. According to the principle of a vase pasted over with coins from the above option, you can turn a simple flower pot into a luxurious planter. Go ahead: the aged lampshade of your favorite table lamp will sparkle with lively renewed colors if you decorate it with the same strings of coin beads. The basis for their fastening is a few wire rings.

You can make such a beautiful table from coins.

For work, select an old table, paint it, update it.

Start sticking coins to the middle of the countertop.

Stick the coins tightly.

This is how we got a decorated table.

Cover the slot with a layer of varnish or silicone.

The table can be used both on the street and in the house - it came out very beautiful here.

If you have accumulated a lot of coins of different denominations and countries, then you can make such a picture.

Glue the coins to the glass and place in the frame. Job is done!

Such a picture can be presented to a guest from another country.
This is how, penny for penny, real ones are created souvenirs from coins... And they cost not at all how many coins are attached to them. Their artistic value is much more expensive than the aggregate denomination of the individual components. After all, both the pricelessness of the author's idea and the work itself are simply incomparable. A striking example of this is the small sculptures of the American artist Stacy Lee Webber, created from one-cent coins.
Works by Stacy Lee Webber

Works by Stacy Lee Webber

Works by Stacy Lee Webber

Works by Stacy Lee Webber

Works by Stacy Lee Webber

Works by Stacy Lee Webber

Works by Stacy Lee Webber

Works by Stacy Lee Webber

Works by Stacy Lee Webber

Works by Stacy Lee Webber

Works by Stacy Lee Webber

Works by Stacy Lee Webber

Works by Stacy Lee Webber

Works by Stacy Lee Webber

Works by Stacy Lee Webber
Works by Gabriel Rufete

Gabriel rufete

Gabriel rufete

Gabriel rufete

Gabriel rufete
Works by Colombian artist Federico Uribe


Colombian artist Federico Uribe

Colombian artist Federico Uribe
Works of various arts are bought for money at the most prestigious opening days and auctions. But the bills and coins themselves also become such, for example, in the works of artists Jacqueline Lou Skaggs and Vander Martich, who create small sculptures from the smallest coins. They depict anything: and a tool of labor - hammers and saws, and figures of different people in any life situations, and abstract little things.
It turns out that at the expense of such an inconspicuous little thing that has no special value as a coin, any of us can not only create a funny trinket, a nice gift, a symbolic souvenir, but also join high art.
Crafts from coins photo
Since ancient times, coins have been used to make women's jewelry.

Even the stars wear them. For example, in this we noticed Selena Gomez.


Coin table

Coin table

Coin floor

Coin floor

Furniture made of onet

Coin floor


Another coin decoration, this time a bracelet.

Vest made of coins. Heavy, but dazzlingly shiny.


Coin Crafts Videos
Perhaps every house has a piggy bank with an impressive handful of kopecks, foreign coins and other unnecessary trifles. What to do with all this "wealth"? There is a great idea for creative people - a picture made of coins, which is easy to make with your own hands. Below is a detailed master class with step-by-step photos for making an amulet painting depicting a money tree.
We make a beautiful painting from coins with our own hands
Necessary materials:- Any coins of different diameters;
- The basis for the painting (thick cardboard 1-2 mm thick);
- A piece of burlap;
- Multi-layer napkins of any color or rope (lace);
- Glue gun;
- PVA glue;
- Black spray paint;
- Bronze or silver acrylic paint;
- Auxiliary tools: brush, scissors, brush, etc.
Before using, the coins must be thoroughly washed with soap and water and a brush, then dried and degreased with alcohol. To restore shine to tarnished coins, you can brush them with toothpaste, dry them and polish them with a piece of felt.
Preparing the base of the painting:- Cut a blank of the required size from cardboard.
- Cut off a piece of burlap slightly larger than the cardboard blank. Make sure that the fabric is free of foreign inclusions, holes, irregularities and other defects.
- Apply a sufficient amount of PVA glue to the cardboard and glue the burlap to the cardboard blank, pressing firmly over the entire surface and preventing bubbles.
- Let the base dry for several hours. To prevent the cardboard from warping, you can put a load on top.
First, you need to make a sufficient number of blanks for the future trunk. For this, ropes or laces cut into 15-25 cm long pieces are suitable.
Very neat blanks are obtained from multi-layered paper napkins. You will need 2-3 large napkins of any color. Each napkin should be cut into strips about 1.5 cm wide and moistened with plenty of water so that the paper is completely saturated and slightly swollen. Twist the strips into a tight flagellum. You do not need to strive to obtain perfectly even flagella, from blanks with some defects you will get a more realistic and interesting trunk of a money tree.

On the dried burlap with a simple pencil, draw the contours of the future tree. It is advisable to draw the crown as simple as possible, because it will be filled with coins, and a complex drawing simply will not work. But with a tree trunk, you can show imagination: make it curved, highlight individual branches or powerful intertwined roots.
Gluing wood trunk blanks.Now you can start the most difficult and responsible part of the work - the formation of the trunk of the money tree. With the help of PVA glue, in a sufficient amount applied to the sacking, you need to glue the flagella from napkins (pieces of rope or lace), trying not to go beyond the contours of the picture. There should be no distance between the workpieces. To get a more interesting pattern, you can bend, twist and cross the blanks, striving to imitate the bark of a real tree.

The crown of the tree is formed by coins. A glue gun is used to glue the coins. Do not put too much glue on the coins, as it will be difficult to remove.
First, we glue the coins along the contour, then fill in the free space. We glue the coins with an overlap in such a way that the burlap fabric does not show through.
At the end, remove the remnants of the glue from the surface of the coins with a brush or by hand.

- We cover the entire surface of the painting with black spray paint, leaving no bald spots. If necessary, paint can be applied in 2 layers.
- After the spray paint has dried, you can start painting the money tree. To do this, apply a small amount of bronze or silver acrylic enamel to the surface of the sponge and carefully spread it over the coins and the tree trunk. It is recommended that you first make a proof print on a sheet of paper. It is not necessary to paint the coins and the trunk as a whole, there must be gaps of black color (crown pattern and “cracks” in the tree trunk). Smooth color transitions on the crown of a tree look very nice. Feel free to experiment with the amount of paint.

After drying, the picture of the coins can be framed and the handmade masterpiece can be hung in a conspicuous place.
Related videos
And if you still have unnecessary coins, you can make other options for paintings and panels according to the following master classes:

 The Cave - a typical platform for the cave to play together
 Super fighters play online